Writing Annotations on a Video Asset
You can add annotations to a video asset. In the Annotations window, you can view a
video clip and then add text at different points in the video clip. Because the annotations
stay with the clip asset in Final Cut Server, annotations are useful for making notes for
yourself or others in your workgroup. You can easily view these annotations in
Final Cut Server. They stay with the asset until you manually clear the annotation.
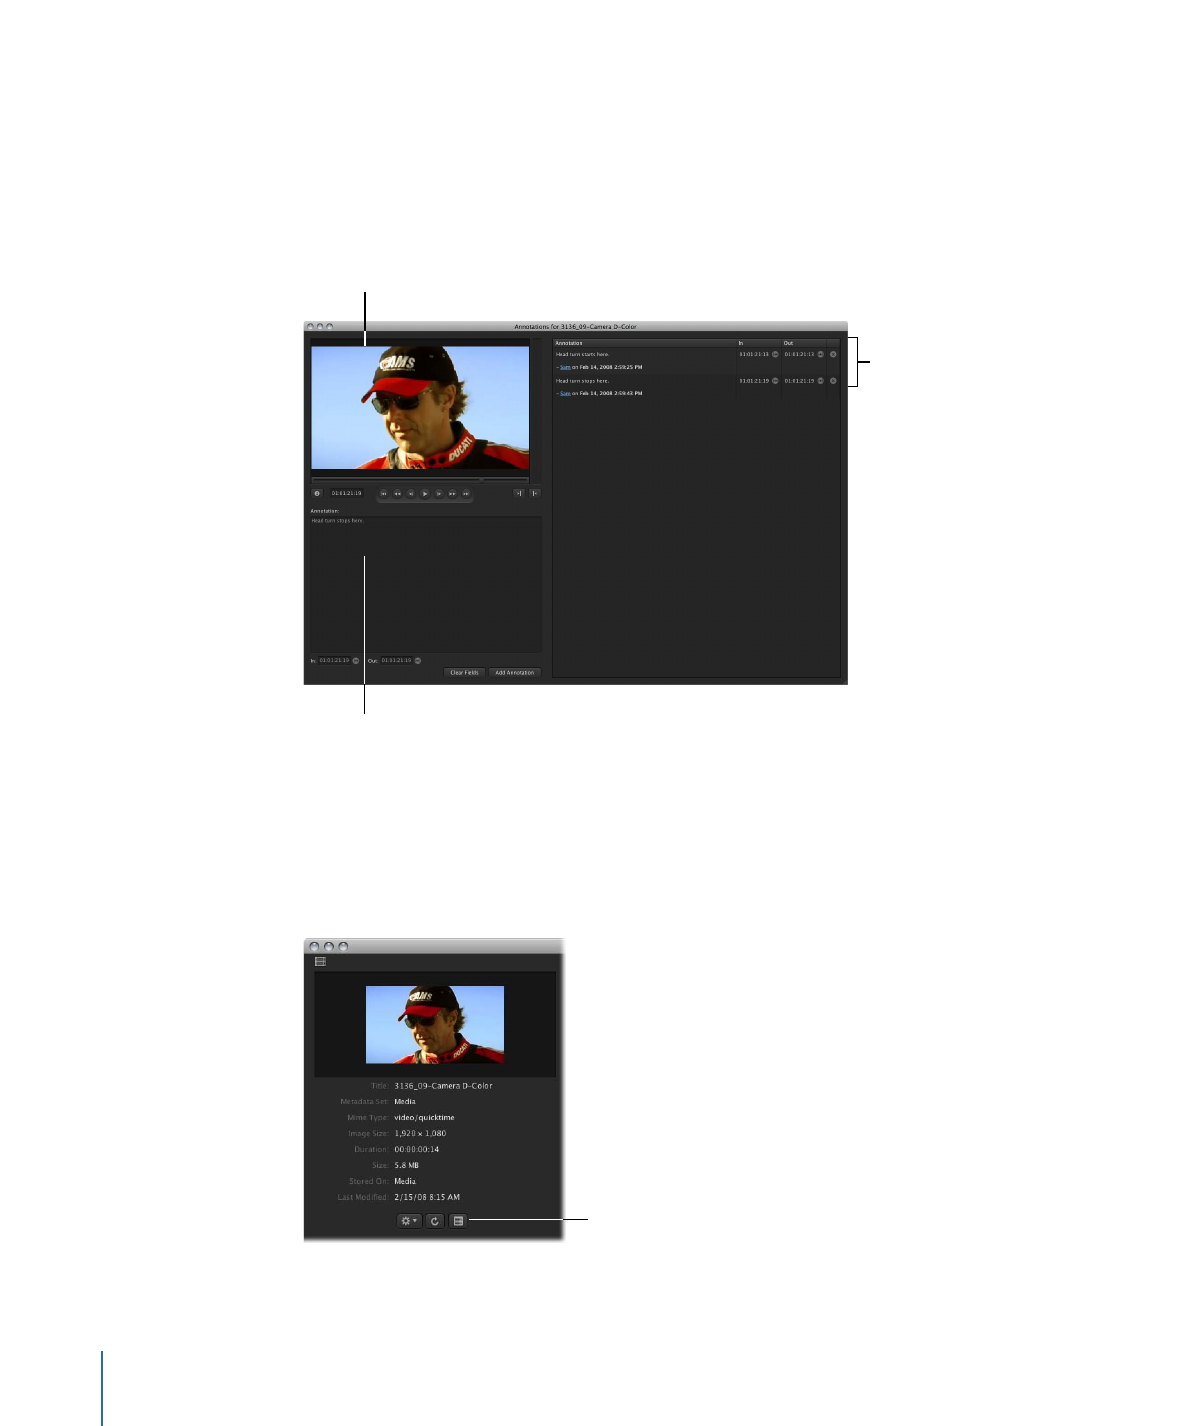
The Viewer window
Add annotations here.
Annotations that have
been entered
To annotate a video asset
1
Locate the video asset you want to annotate in the Assets pane, in a production, or in a
Final Cut Pro project asset’s Elements pane.
2
Double-click the clip asset to display the asset’s info window.
3
Click the Annotate button in the asset info window.
Click the Annotate
button in a video asset’s
info window.
The Annotations window appears.
86
Chapter 5
Working in Final Cut Server
You must mark an In point or an Out point for each annotation.
4
Position the playhead at the In point, either by dragging the playhead or using the
navigation controls. Then click the Mark In button or press I on your keyboard.
You can set an Out point using the same process.
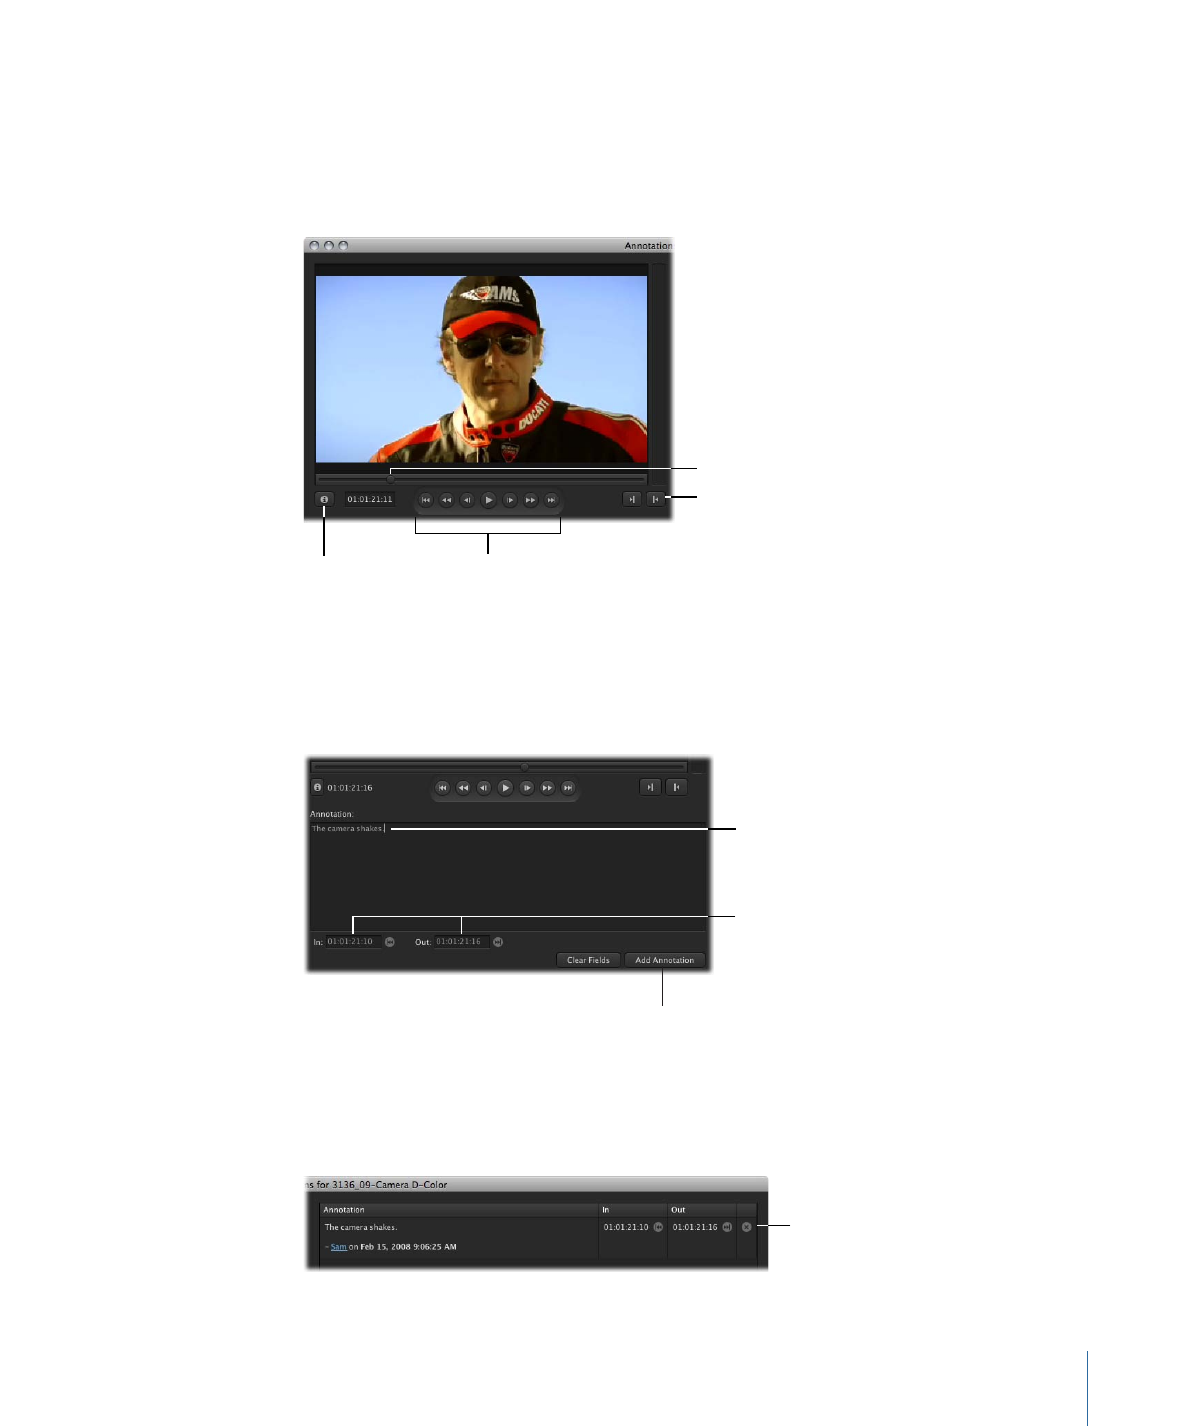
Drag this slider to locate
frames of video.
Click the Mark In and
Mark Out buttons
(or press your keyboard’s
I or O key) to mark
In and Out points.
Use these controls
to play and navigate
through the video.
Click this button
to open the asset’s
info window.
Important:
The keyboard commands are not available when the Annotation field is active.
This allows you to type annotations in the field.
5
Type a comment in the Annotation field below the viewer window.
Click the Add Annotation
button to save the
annotation.
The annotation
The In and Out points
associated with the
annotation
6
To add the annotation to the Annotation list at the right, click the Add Annotation button.
The annotation is added to the list.
The annotation you
added appears in
this list.
87
Chapter 5
Working in Final Cut Server
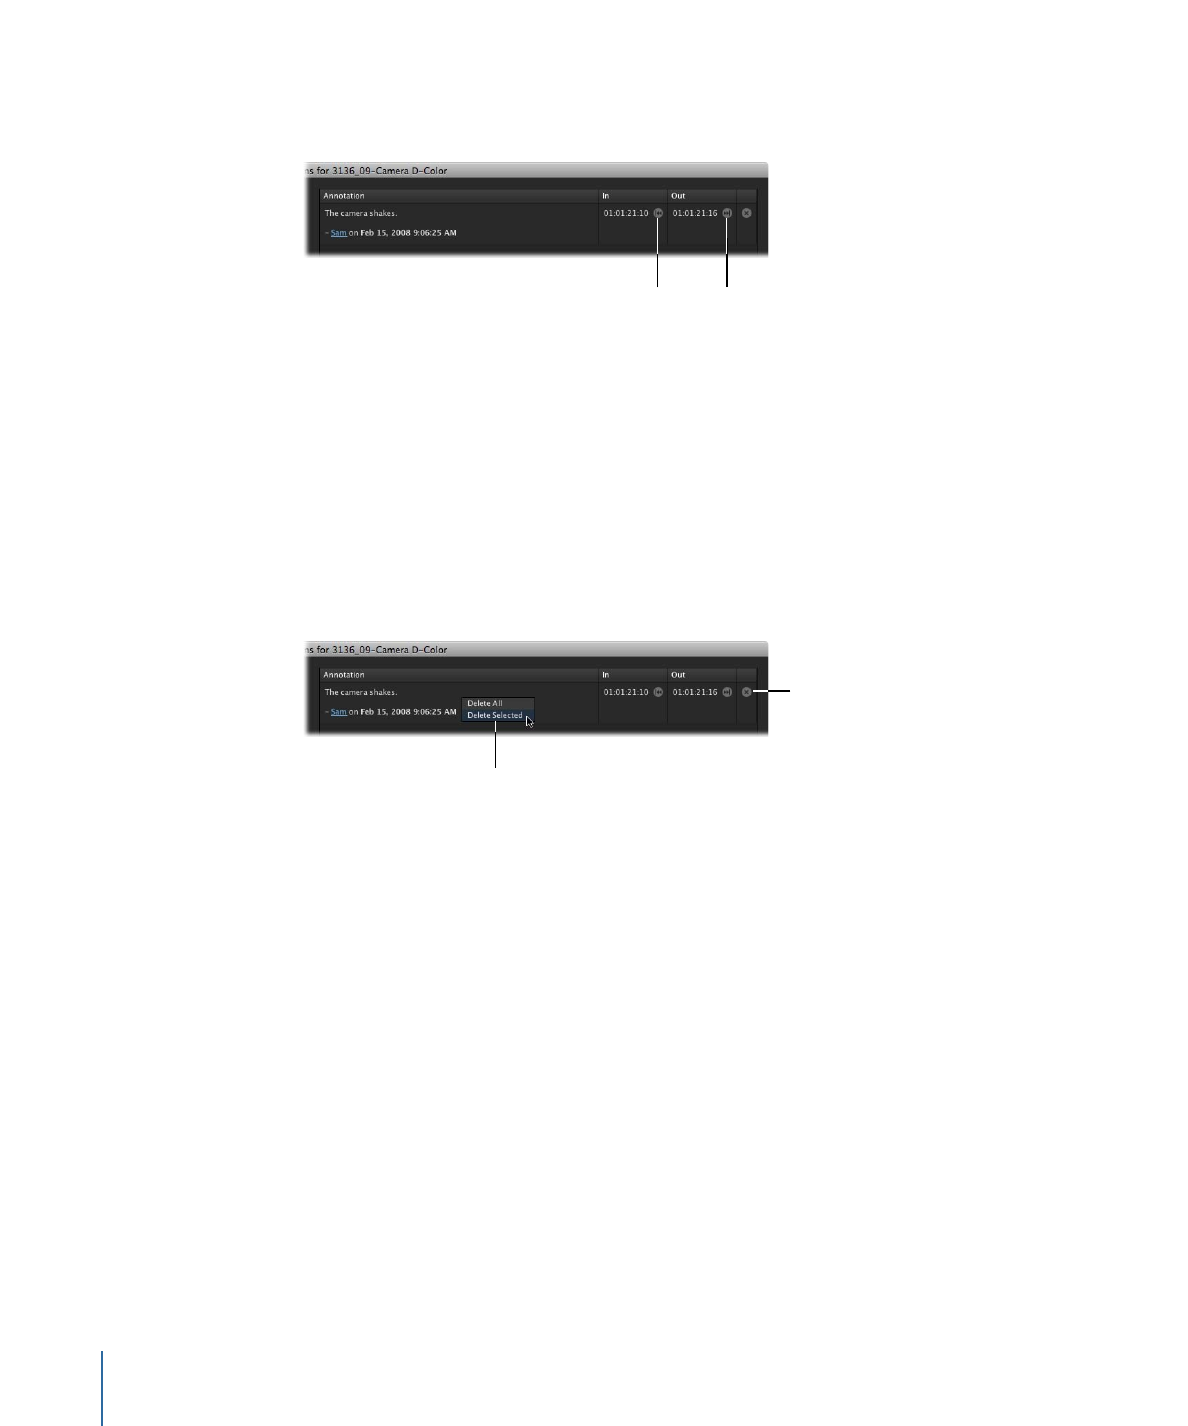
To replace the text of an existing annotation
1
Click the In or Out Point button in the Annotation list.
The In Point button
The Out Point button
2
In the Annotation text field, enter new text for the annotation.
3
Click Add Annotation.
4
A dialog appears, asking if you want to replace the annotation. Click Yes.
The annotation is replaced.
To delete one or more selected annotations from the Annotation list
1
Select one or more annotations you wish to delete.
2
Click the delete button or Control-click the annotation and choose Delete Selected from
the shortcut menu.
You can also click the
delete button to delete
a single annotation.
Control-click an
annotation to open
this shortcut menu.
The selected annotation or annotations are deleted.
To delete all the annotations on an asset
1
Select any annotation you wish to delete.
2
Control-click the annotation, then choose Delete All from the shortcut menu.
3
A dialog appears, asking you to confirm that you want to delete the annotations. Click
Yes.
All of the annotations are deleted.