Uploading a Project and Its Media Files as Individual Assets
If you upload a Motion, Soundtrack Pro, or DVD Studio Pro project and its media files as
individual assets, an asset for each of the files in the folder is created. The project file
uploads in a manner similar to the Final Cut Pro project file; the big difference is that
unlike a Final Cut Pro project asset, the project’s media files are not referenced to the
project file.
To keep the project and its media together, you can add unique metadata to the assets,
perhaps adding the project name or other useful labels. To conveniently store your project
and media assets together, you can upload the files to a new or existing production.
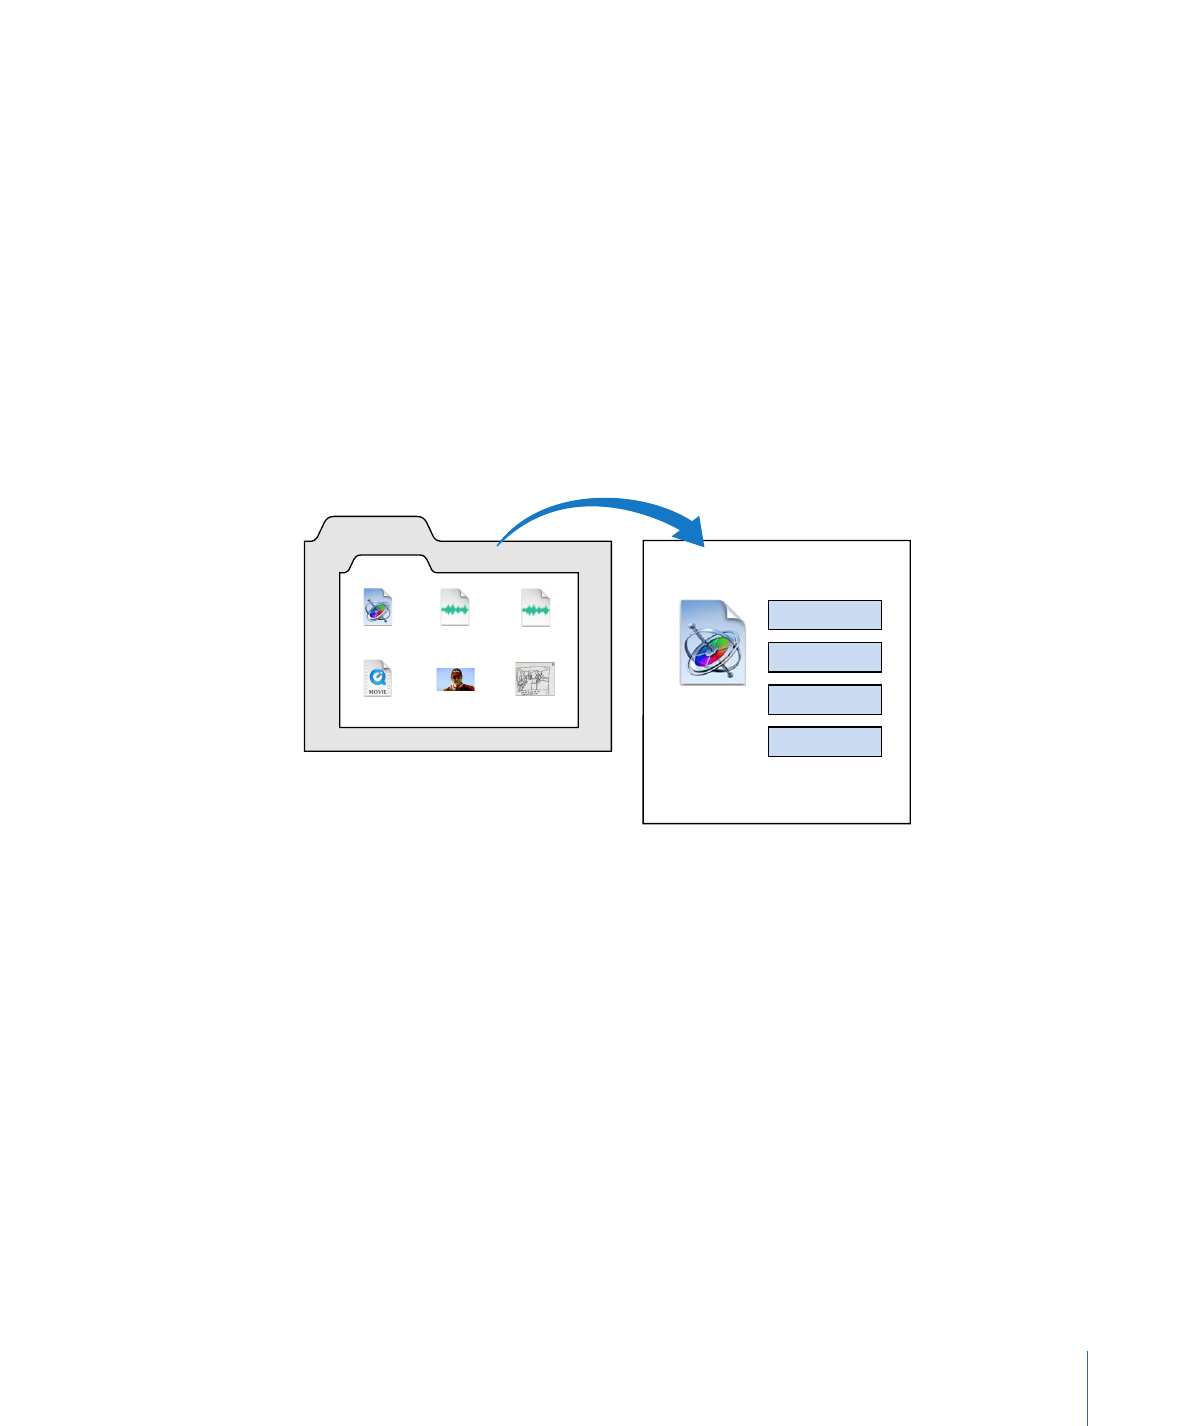
The illustration below shows a Final Cut Studio project and its media being uploaded as
individual assets within a Final Cut Server production.
Upload Final Cut Studio project to Final Cut Server
Note: Each item in the production
is an individual asset.
Final Cut Server production
Folder
Project
.mov
.jpeg
.aif
Clip Proxy
BikeBlur.motn
Road_3232.mov
Music_3225.aif
Rider_322.jpg
Quill_5344.jpg
Motorbikes.aif
Important:
It is recommended that you upload a Final Cut Studio project file and its media
files into a common production. It is also recommended that you add unique metadata
to the project asset and each of its media assets. This metadata should be used only on
the project asset, media assets, and the production. Adding unique metadata and creating
a production gives you two ways to connect the project asset and its media assets.
To upload a Final Cut Studio or other project file and its media files as individual assets
1
In the Final Cut Studio application, save the project and choose to collect the media. In
Motion and Soundtrack Pro, you can do this by choosing File > Save As and choosing to
collect the media in the Save As dialog. In DVD Studio Pro, you need to manually place
the project and media files in a folder.
For specific information about using Motion, Soundtrack Pro, or DVD Studio Pro, see the
application’s user manual.
45
Chapter 3
Uploading Files to Final Cut Server
Important:
When uploading a DVD Studio Pro project file and its linked media files, there
is no need to upload .par files. When you check out and open the project in
DVD Studio Pro, the .par files will be automatically re-created.
The project file and its media are saved in a folder at the location you specified.
2
In Final Cut Server, create a new production for the project and its assets by following
these steps:
a
Open the Productions pane by clicking Productions in the column at the left of the
main Final Cut Server window.
b
Click the New Production button in the Toolbar.
c
Choose a metadata set for the new production from the Metadata Set pop-up menu.
d
Depending on the production type you chose, a number of production metadata fields
appear. Enter a title and other unique metadata for the project in these fields. Fields
marked with an asterisk (*) must be filled in.
e
Click Save Changes to save the new production.
3
Drag the folder that contains the project file and its linked media from the Finder to the
new production in the Final Cut Server Productions pane.
4
In the dialog that appears, choose to upload individual assets and then click Create.
5
A dialog appears, advising that Final Cut Server is unable to manage references that may
exist in the project file you are uploading. Click Continue.
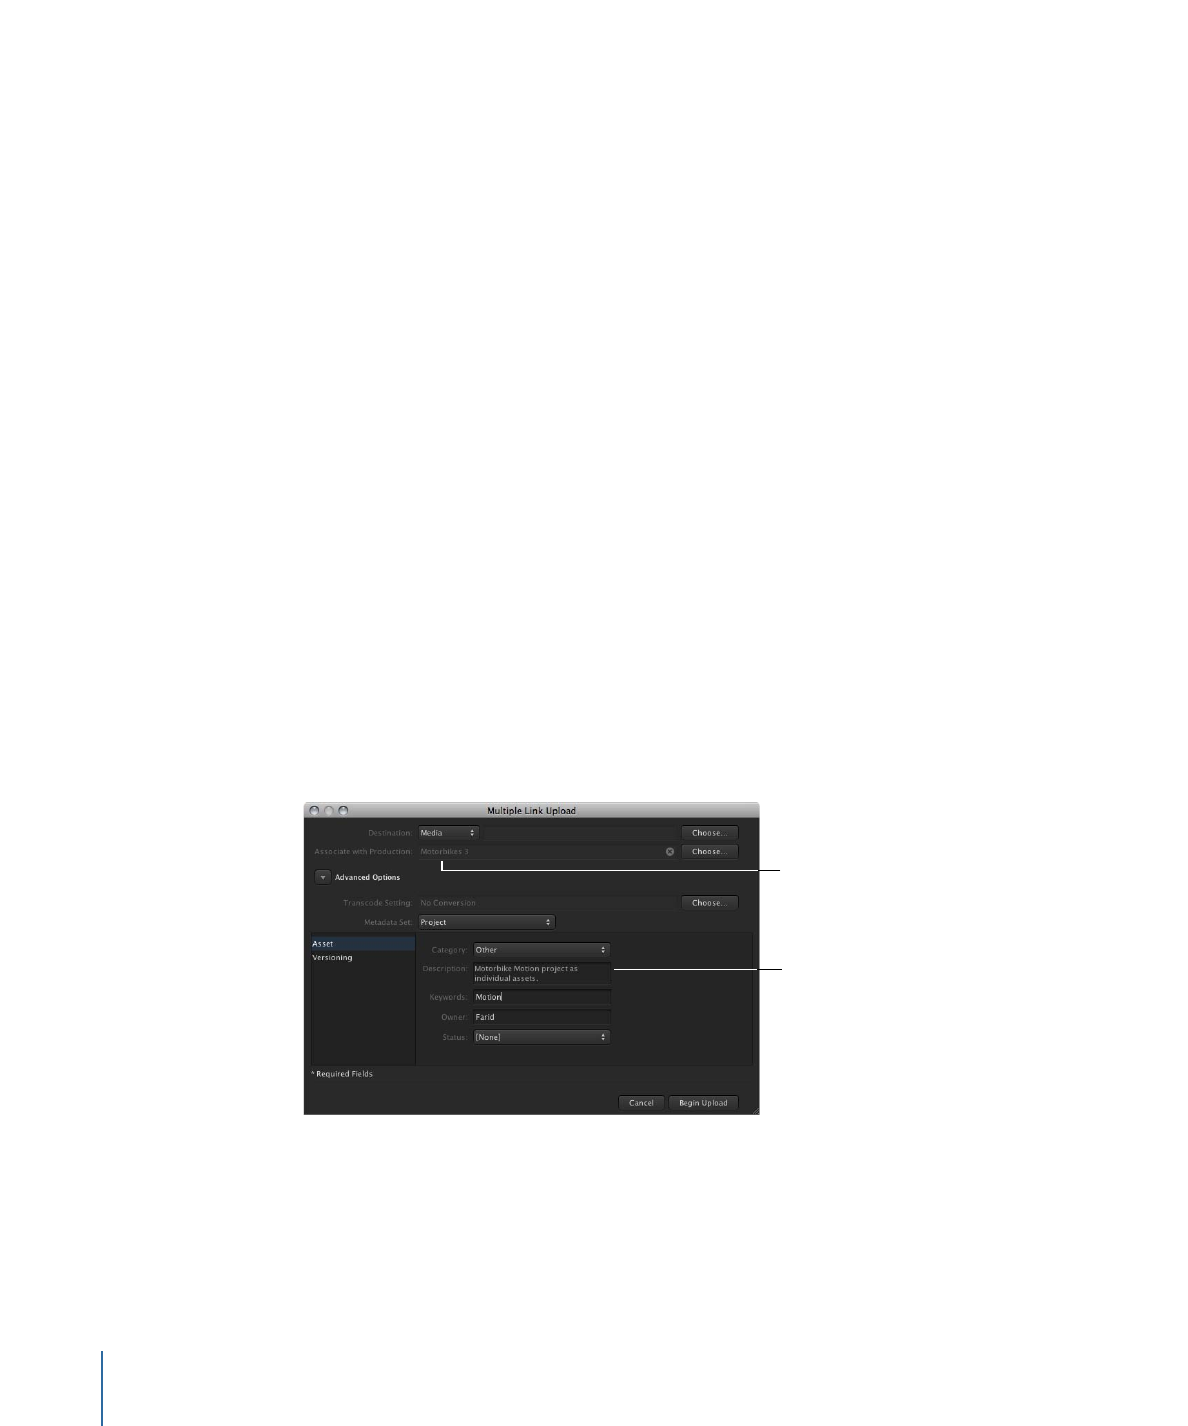
The Multiple Link Upload window appears. Note that the Associate with Production field
shows the production that you dragged the folder to.
Add metadata to
differentiate the files
being uploaded.
The name of the
production that you
dragged the folder
to appears here.
6
Choose a metadata set for the assets from the Metadata Set pop-up menu.
Add unique metadata to the files being uploaded. Adding project-related metadata will
help you keep track of the assets that are linked to the project asset.
7
If necessary, choose a new destination device from the Destination pop-up menu.
46
Chapter 3
Uploading Files to Final Cut Server
This specifies the device on which the file will be stored. If you have questions about
which device to choose, contact your Final Cut Server administrator.
Note: Media and Library are the primary Final Cut Server devices. Talk with your
Final Cut Server administrator about which other configured devices are appropriate for
media file storage.
8
Click the Begin Upload button to create assets for the project file and its linked media
files.
The files are uploaded. The upload progress is displayed above the Information pane in
the bottom-left corner of the Final Cut Server main window. If you want to monitor the
progress of the file upload, click the Downloads and Uploads button to display the
Downloads & Uploads window.
9
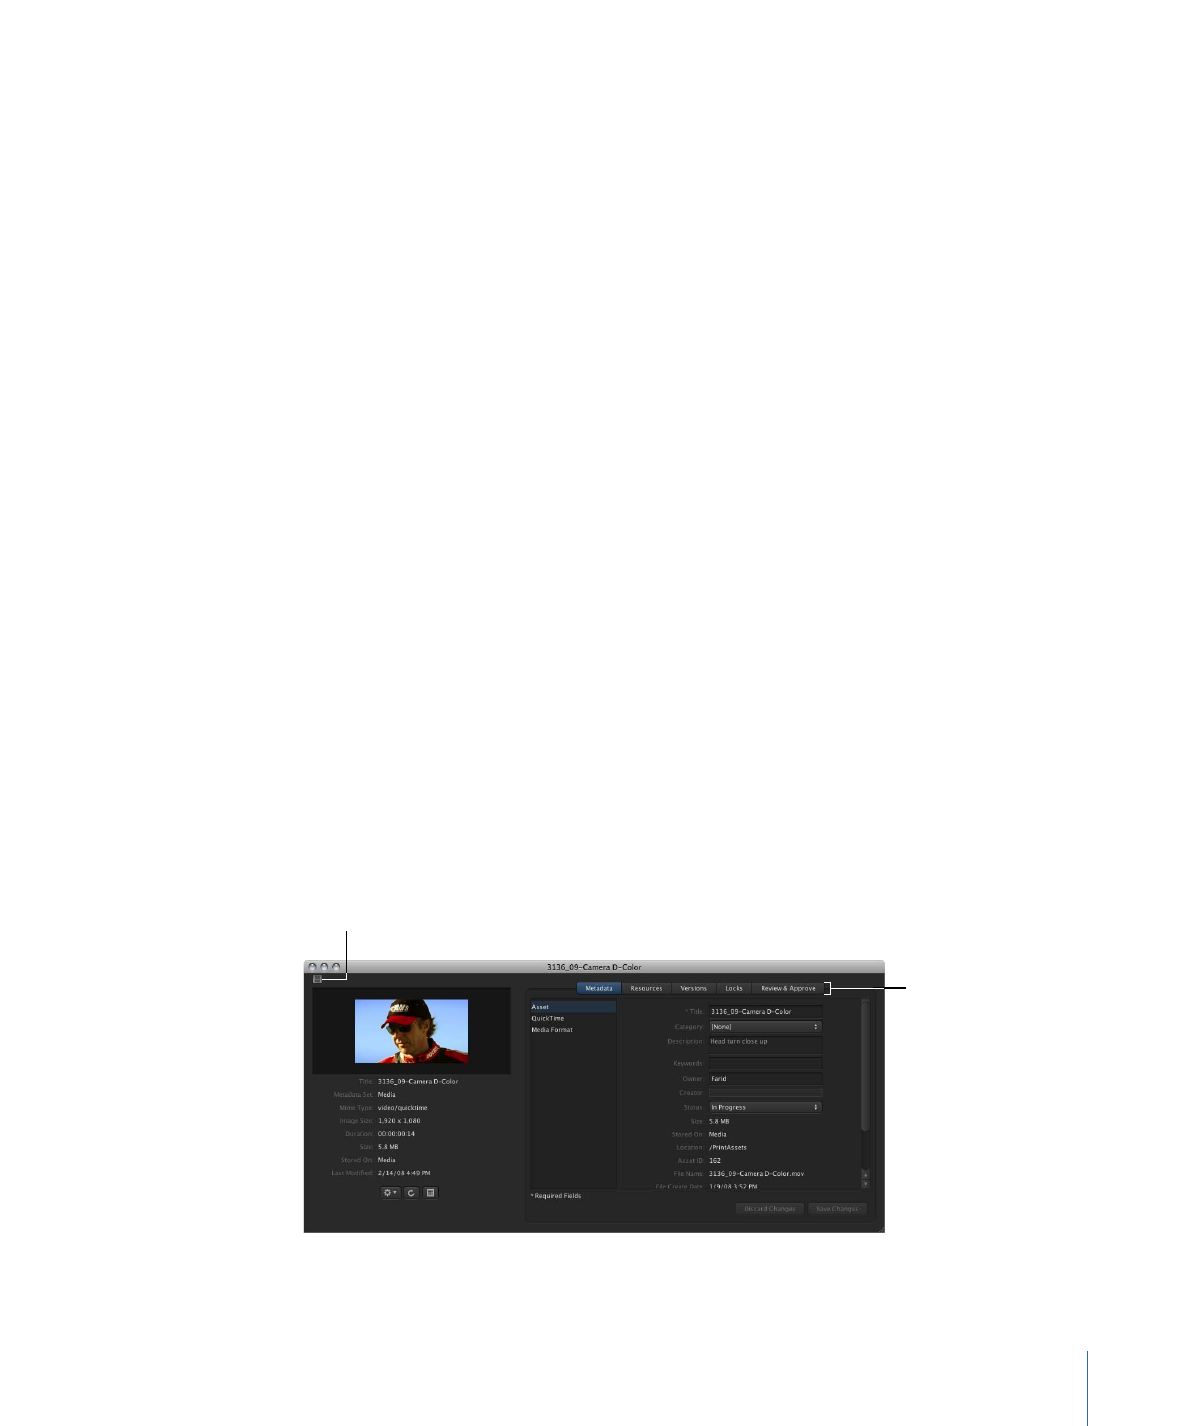
After the files are uploaded, select the Productions pane, click the Search button, and
double-click the production to view the asset aliases.
The Final Cut Studio project file and each of its media files have been uploaded as assets.
The assets also appear in the Assets pane of the Final Cut Server main window.
To learn how to get information about the assets that were just created, see
About the
Asset Info Window
.